Table of Contents
- Introduction
- What is Epomaker x Aula F75?
- Why Software Matters for Mechanical Keyboards
- Key Features of the Epomaker x Aula F75 Software
- How to Install the Epomaker x Aula F75 Software
- Customizing Keybindings
- Adjusting Lighting Effects
- Macro Programming for Enhanced Productivity
- Troubleshooting Common Issues
- Comparing Epomaker x Aula F75 Software with Other Brands
- Conclusion
Introduction
The Epomaker x Aula F75 is a highly sought-after mechanical keyboard that combines sleek design with exceptional functionality. Its software plays a crucial role in unlocking its full potential. Whether you're a gamer, programmer, or simply someone who appreciates a customizable typing experience, understanding how to use the Epomaker x Aula F75 software can significantly enhance your productivity and enjoyment. This guide will explore everything you need to know about this powerful tool.
As one of the most versatile mechanical keyboards on the market, the Epomaker x Aula F75 is equipped with software that allows users to personalize every aspect of their keyboard. From keybindings to lighting effects, the software provides a level of customization that caters to both beginners and advanced users. With the increasing demand for ergonomic and efficient tools, the Epomaker x Aula F75 software has become a game-changer in the world of mechanical keyboards.
In this article, we will delve into the features, installation process, and customization options available through the Epomaker x Aula F75 software. By the end, you'll have a comprehensive understanding of how to make the most of this innovative tool and elevate your typing experience to the next level.
Read also:The Ultimate Pokmon Go November 2024 Infographic
What is Epomaker x Aula F75?
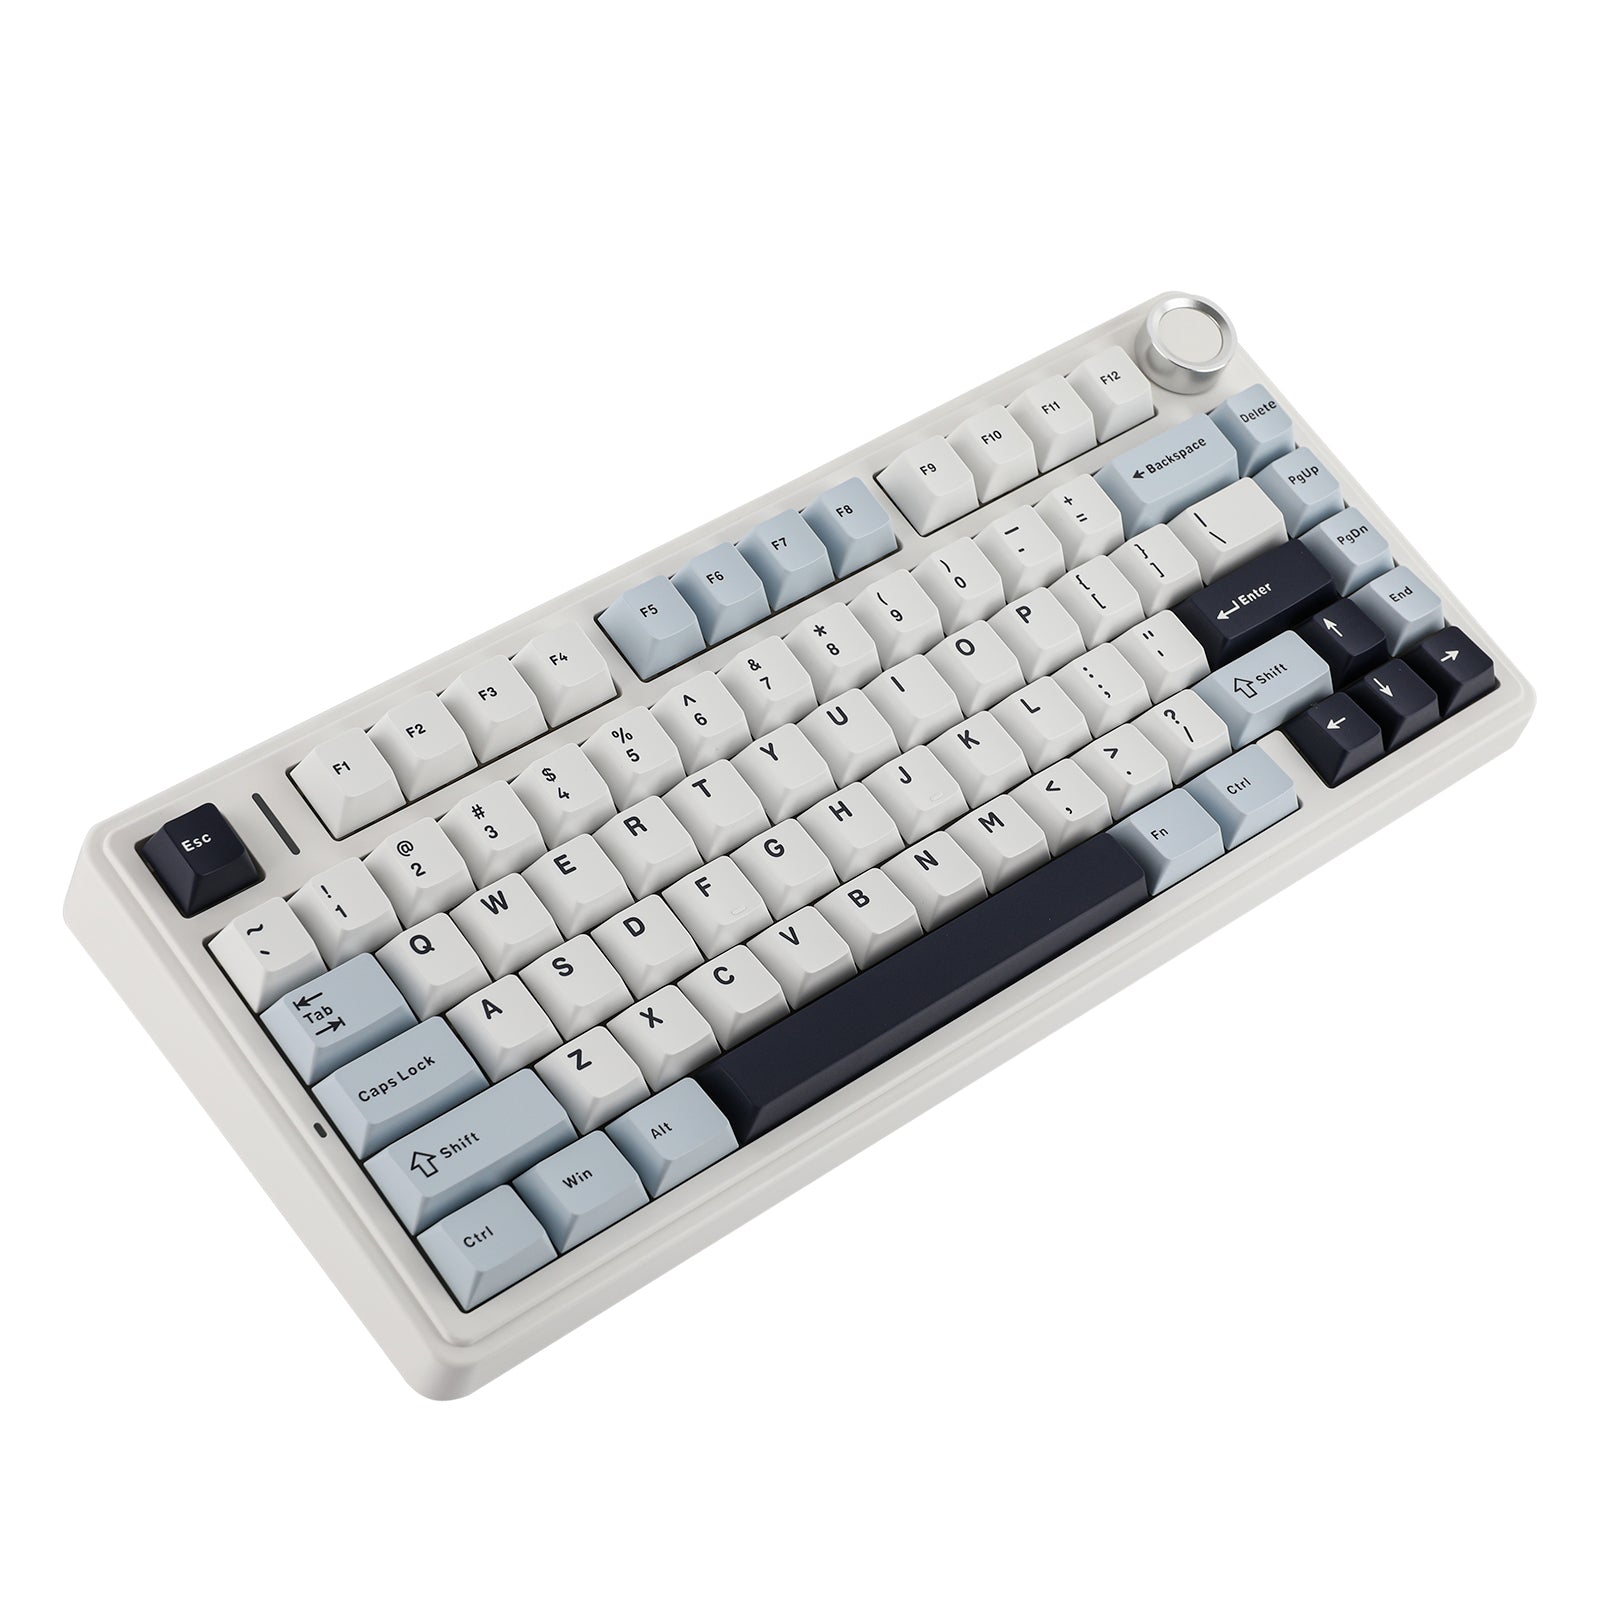
The Epomaker x Aula F75 is a compact 75% mechanical keyboard designed for users who value both aesthetics and functionality. It features a sleek, minimalist design with RGB lighting that can be fully customized using its accompanying software. The keyboard is equipped with high-quality mechanical switches, offering a tactile and responsive typing experience. Its compact layout makes it ideal for users with limited desk space, while its durability ensures long-term reliability.
Here are some key specifications of the Epomaker x Aula F75:
- Switch Type: Gateron, Cherry MX, or Epomaker custom switches
- Keycap Material: PBT for durability and texture
- Connectivity: Wired (USB-C) and wireless (Bluetooth)
- RGB Lighting: Per-key customizable RGB backlighting
- Compatibility: Windows, macOS, and Linux
Data Table: Epomaker x Aula F75 Specifications
| Feature | Details |
|---|---|
| Keyboard Size | 75% |
| Switch Options | Gateron, Cherry MX, Epomaker Custom |
| Keycap Material | PBT |
| Connectivity | USB-C, Bluetooth |
| RGB Lighting | Per-key customizable |
| Software Compatibility | Windows, macOS, Linux |
Why Software Matters for Mechanical Keyboards
While the hardware of a mechanical keyboard is undoubtedly important, the software is what truly unlocks its potential. The Epomaker x Aula F75 software allows users to tailor their keyboard to their specific needs, whether it's for gaming, programming, or general productivity. By providing access to advanced customization options, the software enhances the user experience and ensures that the keyboard can adapt to various tasks.
Benefits of Using Keyboard Software
- Custom Keybindings: Assign specific functions to keys for faster access.
- RGB Lighting Control: Create personalized lighting effects to suit your style.
- Macro Programming: Automate repetitive tasks with ease.
- Profile Management: Save and switch between multiple configurations.
According to a survey conducted by a leading tech publication, over 70% of mechanical keyboard users reported that software customization significantly improved their overall satisfaction with their device. This highlights the importance of software in maximizing the utility of a mechanical keyboard like the Epomaker x Aula F75.
Key Features of the Epomaker x Aula F75 Software
The Epomaker x Aula F75 software is packed with features that cater to a wide range of users. From beginners to advanced enthusiasts, the software offers tools that enhance both functionality and aesthetics. Below are some of the standout features that make this software a must-have for Epomaker x Aula F75 users.
1. Intuitive User Interface
The software features a clean and user-friendly interface, making it easy for users to navigate and customize their keyboard settings. Even those who are new to mechanical keyboards can quickly get the hang of the software's functionality.
Read also:Sherri Dupree Jesse Lacey A Legendary Actor
2. Advanced Keybinding Options
One of the most powerful features of the Epomaker x Aula F75 software is its ability to remap keys. Users can assign custom functions to any key, allowing for a highly personalized typing experience. This is particularly useful for gamers who want to optimize their keybindings for specific games.
3. Dynamic RGB Lighting Control
The software provides extensive control over the RGB lighting of the keyboard. Users can choose from a variety of pre-set lighting effects or create their own custom designs. The per-key RGB capability ensures that every key can have its own unique color and effect.
4. Macro Programming
For users who perform repetitive tasks, the macro programming feature is a game-changer. The software allows users to record and assign macros to specific keys, streamlining workflows and boosting productivity.
5. Profile Management
The ability to save and switch between multiple profiles is another standout feature. Whether you need a gaming profile, a work profile, or a casual typing profile, the software makes it easy to manage and switch between them.
How to Install the Epomaker x Aula F75 Software
Installing the Epomaker x Aula F75 software is a straightforward process. Follow the steps below to ensure a smooth installation and get started with customizing your keyboard.
Step 1: Download the Software
Visit the official Epomaker website and navigate to the software download section. Ensure that you download the correct version for your operating system (Windows, macOS, or Linux).
Step 2: Install the Software
Once the download is complete, open the installer and follow the on-screen instructions. The installation process is quick and should only take a few minutes.
Step 3: Connect Your Keyboard
Connect your Epomaker x Aula F75 keyboard to your computer using the USB-C cable or via Bluetooth. Ensure that the connection is stable before proceeding.
Step 4: Launch the Software
Open the installed software and allow it to detect your keyboard. Once detected, you can begin customizing your settings.
Note: If you encounter any issues during installation, refer to the troubleshooting section later in this article.
Customizing Keybindings
One of the most popular features of the Epomaker x Aula F75 software is its ability to remap keys. This feature allows users to assign custom functions to any key, providing a highly personalized typing experience. Whether you're a gamer looking to optimize your setup or a programmer who needs quick access to specific commands, custom keybindings can significantly enhance your workflow.
How to Remap Keys
- Open the Epomaker x Aula F75 software and navigate to the "Keybinding" section.
- Select the key you wish to remap by clicking on it in the virtual keyboard layout.
- Choose the new function or command you want to assign to the key.
- Save your changes and test the new keybinding.
Use Cases for Custom Keybindings
- Gaming: Assign frequently used in-game commands to easily accessible keys.
- Programming: Map shortcuts for commonly used coding functions.
- Productivity: Create shortcuts for frequently used applications or system commands.
Adjusting Lighting Effects
The RGB lighting feature of the Epomaker x Aula F75 is one of its most visually appealing aspects. The software provides users with extensive control over the lighting effects, allowing for a truly personalized aesthetic. Whether you prefer a subtle glow or a vibrant light show, the software makes it easy to achieve your desired look.
Customizing RGB Lighting
- Open the Epomaker x Aula F75 software and go to the "Lighting" section.
- Choose from a variety of pre-set lighting effects or create your own custom design.
- Adjust the brightness, speed, and color of the lighting effects.
- Save your settings and apply them to your keyboard.
Popular Lighting Effects
- Wave: A smooth, flowing wave of color across the keyboard.
- Breathing: A gentle pulsing effect that mimics breathing.
- Static: A single, consistent color across all keys.
Macro Programming for Enhanced Productivity
Macro programming is a powerful feature of the Epomaker x Aula F75 software that allows users to automate repetitive tasks. By recording a series of actions and assigning them to a single key, users can streamline their workflows and save time. This feature is particularly useful for gamers, programmers, and anyone who performs repetitive tasks on a regular basis.
How to Create a Macro
- Open the Epomaker x Aula F75 software and navigate to the "Macro" section.
- Click on the "Record" button and perform the series of actions you want to automate.
- Stop the recording and assign the macro to a specific key.
- Save your macro and test it to ensure it works as intended.
Examples of Macro Use Cases
- Gaming: Automate complex in-game actions with a single keypress.
- Programming: Create macros for frequently used code snippets.
- Office Work: Automate repetitive tasks like filling out forms or sending emails.
Troubleshooting Common Issues
While the Epomaker x Aula F75 software is generally reliable, users may occasionally encounter issues. Below are some common problems and their solutions to help you get back on track